Artificial Grass Installation Tips
Your Step-by-Step Artificial Grass Installation Guide
Artificial grass installation offers a practical solution for homeowners seeking a lush, green lawn without the upkeep of natural grass. Synthetic turf has advanced significantly in recent years, resulting in durable, realistic-looking options that can enhance any landscape. Whether for a backyard, playground, or commercial property, installing artificial grass provides numerous benefits. It requires minimal maintenance, conserves water, and eliminates the need for pesticides. It also provides a safe and comfortable surface for pets and children.
In this guide, we will cover essential DIY artificial grass installation tips to help you achieve a beautiful and functional outdoor space. From preparation to the final touch, we’ll provide the advice you need to know how you can install artificial grass like a pro.
Step One – Have a Plan in Place
Having a solid plan in place before installing artificial turf is essential for the best outcome. Start by carefully inspecting the area where you intend to lay the turf, ensuring it’s free from debris and obstacles. Cleaning the space is a priority, as this will simplify the installation process.
Identify the tools required for the job, such as shovels, turf cutters, and utility knives. During the excavation phase, hand tools can help navigate tight spaces more effectively, clearing any roots or stones. You’ll also want to make any necessary adjustments to any existing irrigation or drainage systems to accommodate the new artificial lawn.
Step Two – Prepare the Base for Your Artificial Grass
A vital phase of installing artificial grass involves thoroughly removing any existing natural grass and debris. This step is crucial for creating a solid foundation. Excavate the top four inches of soil and dispose of it properly.
Once the area is clear of organic material, lay down a weed barrier fabric. This material helps prevent unwanted growth and enhances the stability of your installation. Use a weed barrier fabric with a thickness between 2 and 6 mm, as it effectively guards against root intrusion and pest issues.
Step Three – Base Installation
Install your base by adding a layer of compacted material consisting of gravel and sand mixed together. For optimal results, aim for a thickness of 3 to 4 inches. Spread the mixture evenly across the area, ensuring it is level and well-defined.
To prevent uneven surfaces, avoid adding heavy weights to the base until it is fully compacted. Use a hand roller filled with water to compact the base effectively and achieve a smooth finish. Check that all edges are clear of debris to create a polished, professional look for your artificial grass.
Step Four – Measuring & Laying the Synthetic Grass
One of the best practices for installing synthetic grass is to confirm your design is well-defined and clear. Take time to measure the installation surface accurately, checking your measurements multiple times for precision.
Once measured, lay the artificial grass flat and check for any creases or wrinkles. If necessary, allow it to rest in position for a few hours to ensure it maintains its shape. Cut the largest piece of grass according to your measurements before rolling it out, being careful not to drag the turf across the base. Make sure all tuft rows and blades face the same direction.
A carpet kicker can help stretch the turf into place, and when cutting around rocks or other hardscaping features, start from the center of the object. Make small slits in the grass to create clean edges against the object. The goal is to have the turf lay flat with no wrinkles to create a professional finish.
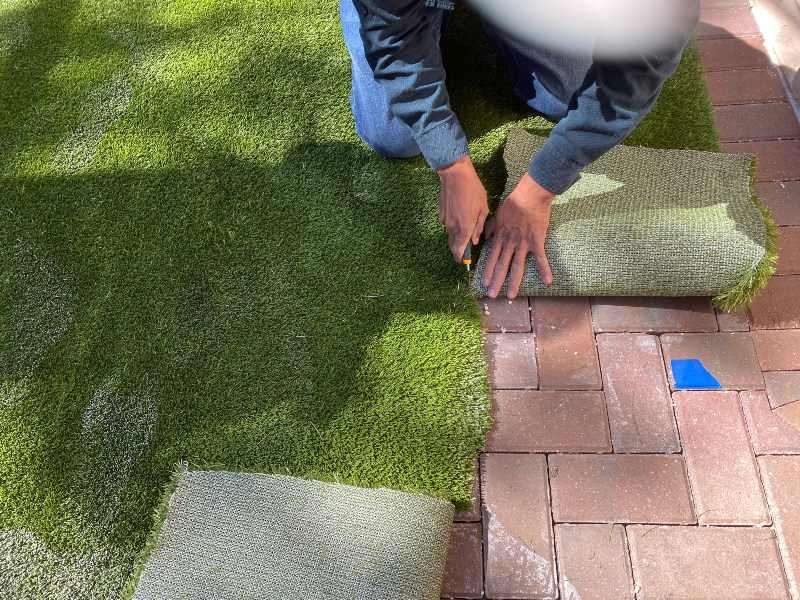
Step Five – Trim the Edges & Anchor the Perimeter
Once the artificial grass is in place, it’s time to trim the edges and secure the perimeter. Move carefully over the turf to prevent it from moving. Use a sharp box cutter to make clean cuts along the edges, trimming about ¼ inches away from walls, sidewalks, and other elements. This precision helps maintain the integrity of your installation.
Next, it’s essential to anchor the perimeter to prevent shifting due to weather changes. Use 5-inch turf nails to secure the grass, placing them every six inches along the edges. For added stability, anchor the grass to a flexible material like bender board. This method allows you to tuck the board in and place the nails, ensuring a neat and polished finish for your artificial lawn.
Step Five – Adding the Infill
After laying the synthetic grass, the next phase involves adding infill. Gather your infill materials, a drop spreader, and hand tools. The drop spreader ensures an even distribution of infill across the turf.
Before applying the infill, brush the turf to help the blades stand upright and create a vertical blade memory. Use a stiff broom or carpet rake to lift and prepare the fibers. Spread the infill slowly, avoiding overlap to maintain consistency. Pay attention to the edges, applying finishing touches by hand for a polished appearance.
Common Mistakes to Avoid When Installing Artificial Grass
Avoiding common pitfalls during artificial grass installation can dramatically improve results. A frequent mistake is not properly preparing the base. Ensure the ground is level, compacted, and free from debris before laying down the turf. Failing to account for drainage is another oversight. Proper drainage maintains a healthy lawn and prevents water pooling.
Also, ensure the seams between turf pieces are secure. Visible and poorly aligned seams can lead to uneven wear over time, ruining the overall look of a well-manicured lawn. You also want to avoid applying too much infill, which can create a stiff surface. Even infill distribution keeps the grass fibers looking lush, natural, and upright.
Don’t Have Time for a DIY Project? Our Installers Can Help.
These tips for installing artificial grass will help you achieve a beautiful, long-lasting lawn. But if you don’t prefer the DIY route, you can rely on our skilled team at Las Vegas Artificial Lawns for professional artificial grass installation. We can handle everything from design and preparation to the finishing touch. Each step we take follows the best artificial lawn installation techniques, resulting in a flawless and beautiful finish.
Enjoy the benefits of an artificial lawn without the effort, allowing you to focus on what matters most while we transform your outdoor space into a beautiful lawn that lasts for years.